

|
| How to install MiraMon | How to uninstall MiraMon |
How to install MiraMonThe MiraMon family consists of a set of products, which can be viewed at MiraMon products and license types: registration, purchase and download. This section explains the installation and uninstallation of professional MiraMon. Professional MiraMonIt is the desktop application and the most powerful of them all. It allows the visualization, consultation and printing, different tools for the exchange between data formats, topics of cartographic and geodetic geometry, spatial analysis, remote sensing tools, documentation and cataloging of metadata, use of GPS or creation of automatic processes. It is a 32-bit and 64-bit application that can run on Windows platforms, from version 95 to W10, programmed in ANSI C language in its entirety. There are currently three types of MiraMon licenses that allow the installation of the program: License of the Generalitat de Catalunya: Free version of MiraMon for exclusive use in the Public Administration, research centers, network of custody of the territory and students of Catalonia. To have this license you need to be previously registered with the License of the Generalitat de Catalunya. Academic license: Free version of MiraMon for the exclusive use of students and schools. To be licensed, it is needed to be pre-registered with the MiraMon Academic license. Ordinary license: Paid version of MiraMon for other users. An ordinary license can be purchased by clicking at this link. The installation/uninstallation of MiraMon is done telematically from a single file: inst_mm*.exe (where * indicates the version number, for example  Installation and uninstallation are managed from the same environment: 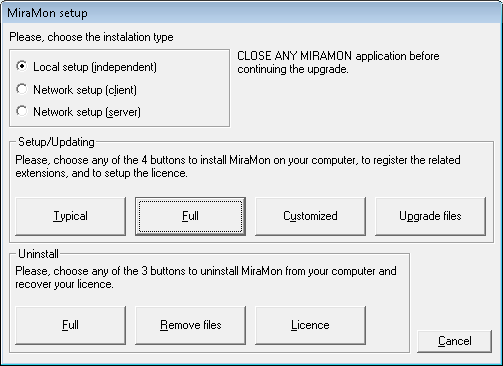 Installation options: In the event of a local installation, you can choose between the typical, full or customized installation, or simply update the files. Firstly , in the event of a typical installation or a full one, you must define the disc and directory of the MiraMon compressed files given in the CD that you have acquired or downloaded from the Internet: https://www.miramon.cat/download/index.htm), where to install the program and where to configure MiraMon (maps, symbolization tables, symbols and MiraMon templates). You can change the defect disc and directory that MiraMon gives you by writing the new one or looking for the folder with the three-point button for each option. 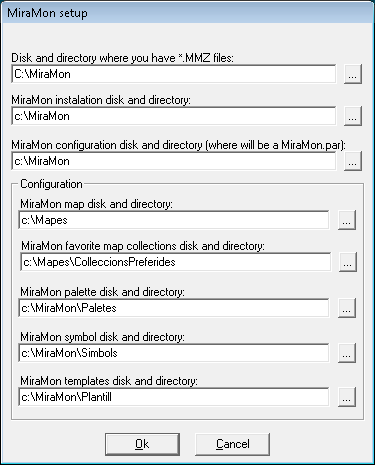
If you modify the disc and directory where you want to install MiraMon, the change is reproduced in the rest of the edit boxes (except for the disc and map directory). If the directories do not exist, MiraMon will create them. Follow the next steps. When you are updating the program all the MiraMon applications must be closed. Once you have defined the disc and directory of each option, you can consult the files that are going to be installed or upgraded by pressing the button "Files" in the box. 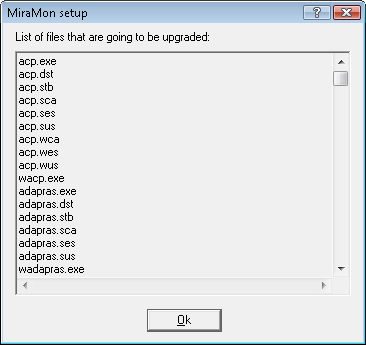
In the case of the typical installation, once the files are uncompressed, the installation has finished. You can download the program updates through the MiraMon Upgrade Service. In a complete installation, once you have chosen the disc and directory, you can access the first boxes of File extensions management. How to link each type of MiraMon extension (Maps - MMM -, compressed Maps - MMZX/MMZ -, raster files- IMG, JPG... - etc) is defined in these dialogue boxes. For instance, in the case of the MiraMon maps, if you leave "Open, Edit, Print", it allows you to open the file with a double click, as well as edit and print (or uncompress if it is a compressed Map, or access metadata if it is a IMG file) using the right button. In other extensions, the possibilities are different (to open with Excel, to open with block, to export to HTML, etc). For the extensions that are different from the MiraMon ones (BMP, ), the extension management is "To open the file with MiraMon" and, therefore, if you double click on a file in this format, you will open it directly with MiraMon. If you have chosen "not link", you will not alter the previous properties of the link. To continue with the configuration of the rest of extensions in the link (PNT, ARC, NOD, POL, VEC, DBF, MDB, DSN, REL, DOC, DVA, DVT, DVN, DVP, DVC, P25, PAL, P65, PAR, MMC, MRC, etc) you should press the right arrow button, and proceed as in the first box. These options can be modified according to your preferences. In addition, you can choose to show all the extensions in the explorer, only those of MiraMon (very recommendable), or none of them. 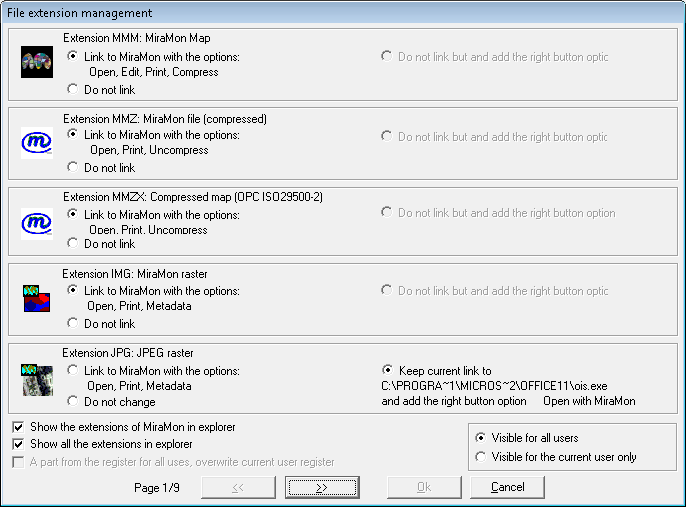
Once the extension link is defined, you must define the name of the group of MiraMon programs as well as the path and if you wish that the program will be visible for all users or for the currant user only. 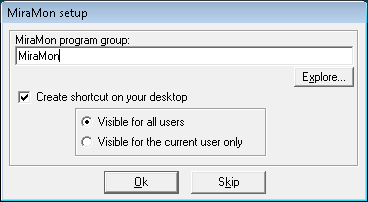
Once you press "Ok", the installation will finish. In the case of a customized installation you can choose between the following options: 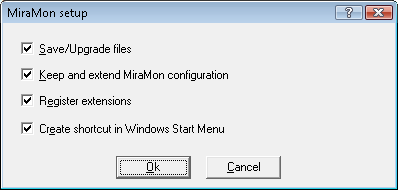
Supposing that you only wish to update the program, you must simply define the disc and directory where you have the *.mmz upgraded files, discs and directory where you want to install the program (remember that you can download the program updates through the MiraMon Upgrade Service). If you activate the second option, you will update the MiraMon.par file for configuring the program parameters. If you wish to register the extensions, you must activate the third square. The users in Windows networks or Novel networks Netware can acquire a network installation license in the servant. This license controls the total number of clients who execute MiraMon simultaneously and makes installing it in large networks very easy. You must install MiraMon in the server as explained above and configure the files ("login script", ) in each client machine. Each user will be able to define a special
configuration (directory where they keep their maps or symbolization
tables, number of decimal figures, ). If you have client machines with
hard disks and you want a personal configuration for each of them, install
MiraMon in the server as explained above and repeat the program
installation (INST_MMx.exe) for each client machine with the appropriate
path. Next follow these steps: 1/ Copy the MiraMon.par file in a hard disk directory of each client machine 2/ Select the MiraMon icon in each client machine
(clicking just once with the mouse) and press "Alt+Return" or
select "File | Properties" from the Windows Program Manager
(or access the "Properties" by clicking with the right
button). Write the same directory where you have copied the MiraMon.par
file into the "Working Directory" box. From now on, all the
changes done in the configuration file will only be recorded in each
user's MiraMon.par file. Important: The Working Directory should not
be write protected unless you wish to stop users from modifying the
default configuration parameters.
How to uninstall MiraMonTo uninstall MiraMon while maintaining the license that you purchased, you must have an Internet connection (if not during the entire process, at least at some point). |