 |
Zoom menu |
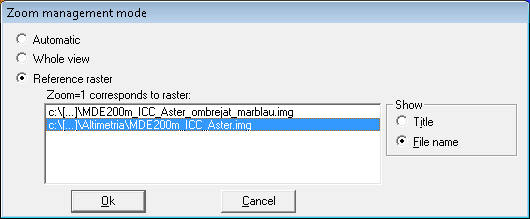
MiraMon handles zoom by default based on the overview of all open layers (Whole view mode), although it is possible to set the zoom to be managed based on one of the open rasters, which is the first by default, regardless of the existence of other raster layers or vectors (reference raster mode) or it can be switched between the above modes, applying the reference raster mode if all open rasters have the same pixel side, and applying the mode Whole view mode otherwise.
This allows you to change the magnifying and reducing levels with which you display a raster or a vector map. In reduction zooms on rasters, one column and one row of each n are represented, ignoring entirely the other columns and rows (so the colors are never mixed). All zooms are performed on the original file, not over the graphic memory; this allows you to display all the possible information all the time, which is an essential feature for geographical information systems.
In the case of magnifying zooms on rasters, MiraMon always shows whole cells, for this reason a thin line may appear with a background color on the right and/or on the lower side of image: this concerns lines that, at the zoom level we are working with, do not allow you to insert another column and/or row of cells. This is normal and does not imply any running trouble. If you want to remove these lines, you can do it by suitably resizing the display window.
If you are displaying vectors and you use the scroll bars, MiraMon cannot update a narrow band on the right and on the bottom (these areas are shown with the background color if you have a raster loaded); this is because it takes less time of aditional redrawing. In this case you can fill the entire client area by executing "Display | Redraw".
In all zoom operations, the upper left corner of the image is used as the reference. The program determines if it is necessary to add or remove the scroll bars, always trying to take advantage of the largest amount of displaying surface inside the client area of the application. This criteria makes it possible for the upper left corner to change therefore avoiding having, at the same time, free "background color" on the right side or below and not displaying a portion of the map on the left side or above.
Redrawing operations of raster maps are faster when the zoom level is 1.
In this kind of zoom, the user defines the area of the new view by drawing a rectangular window. MiraMon takes the upper left corner of this window as the new upper left corner and determines the new zoom level, so that the entire selected area is visible.
You have to click with the right button on two of
the opposite window's vertices to draw a rectangular window. You do
not have to click and drag but rather click twice. Once the first vertex
is selected (fixed), the mouse movements will draw an orientative
rectangle until a new selection establishes the definitive rectangle. It
is possible to scroll the map or even do a numerical zoom, resize the
window or switch with another application before or while defining
the two rectangle's vertices. While the process goes on the zoom icon
 will be shown and it will not be possible to
access to the File, Edit and Display menus. An alternative way to
"Zoom | Define window", is to press the icon
  located in the tool bar.
As the drawn rectangle will probably not be proportional to the program window, the new zoom can show, besides the area of interest, lower zones or zones more to the right than the drawn window. If you want to remove these zones you have to resize the program window properly.
You can "unhammer" the first corner of the zoom, or even undo the operation, using the "backspace" key (<--).
This zoom acts as the previous one, but you define the zoom coordinates (map coordinates) by typing them with the keyboard. Raster files also support (column, row) coordinates. MiraMon will zoom and will show the desired area using a red line; this mark will disappear simply redrawing.
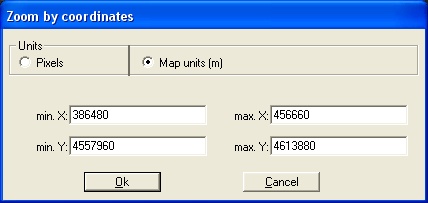
MiraMon is quite tolerant in zoom by coordinates: only negative raster coordinates and inverted coordinates (min>max) are considered to be errors; if you enter coordinates beyond the limits of the opened layers, MiraMon will simply adapt them to the limits of your map.
Finally, note that if you enter a square area and the MiraMon window is in landscape form (opposite to portrait), you will obtain an "extra" area on some of the sides (normally on the right side, unless you already are at the right end of the map).
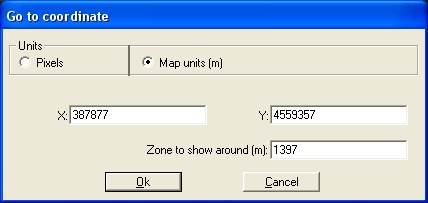
In this type of zoom you type in a central coordinate (X,Y) and a zone to show around, expressed in the same units as the coordinates themselves; MiraMon will place you over this point and will draw with a red line both the central point and the desired surrounding area; these lines will disappear by simply redrawing. Raster files also support (column, row) units.
 |
 |
The geometric behaviour of this functionality is quite similar to the "Zoom by coordinates". Please read that section for more information.
This type of zoom takes the upper left corner as the
reference point for a new view, which will be a zoom level above the
current one. An alternative way to "Zoom | Zoom in", is to press
the icon  located in the panel of
buttons.
This type of zoom takes the upper left corner as the
reference point for a new view, which will be a zoom level below the
current one. An alternative way to "Zoom | Zoom out", is to
press the icon  located in the panel of
buttons.
To move the map it is necessary to position the
cursor, shaped like an open hand, on the zone that you wish to move and
click on it with the left mouse button. When the hand closes you can move
the visualization as much as you want. An alternative way to "Zoom |
Pan", is to press the icon  located
in the panel of buttons. While you are moving the visualization it is not
possible to access the File, Editing or Visualization menus.
This allows you to enter the desired display scale using the keyboard. MiraMon will zoom to the required scale or to the scale smallest it can display.
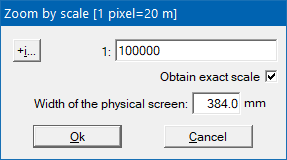
As the scale is a parameter that depends on the size of your screen, you can indicate the active area of your monitor. You can also store this parameter in the "X_mm_Pantalla" key name of the MiraMon.PAR file ("Help | Configure parameters"); in network systems each user can have a different value to support different monitor sizes.
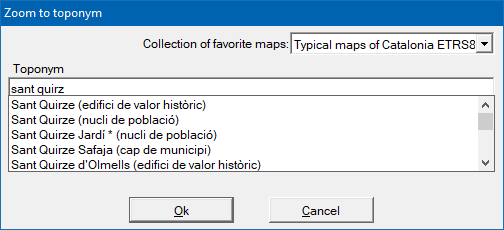
The option "Zoom to toponym" allows the user to write the place name or part of the text of the place name that is tenth to locate. The program will search within the dictionary of toponyms related to the selected collection in the top of the box, dictionary that is incorporated by default with the program from v.7, and presents a list with all the place names found that contain the written text. Then just select one of the texts and, in case of having selected any of the maps of the preferred collections, the program will place the view on desired place, showing it with a box, usually red. In case of using a different dictionary, it can be selected from the dropdown. It must be remembered that, at least for the moment, dictionaries are linked to collections of favorite maps. Apart from the user's own dictionaries, MiraMon distributes some dictionaries linked to their typical collections of favorite maps; these lists of place names are usually suitable for most uses as they contain several tens of thousands of entries each.
After a query by attribute, you can use this option to come close up to the set of selected objects or pixels. This is useful when the selected objects are small (vectors) or only a few pixels (rasters).
Remember that if the display of a certain layer is restricted to some scales, the display of the selected objects wil also be restricted to the same scales. This can mean that "Zoom to selected" does not display any of the selected objects. For example, imagine you have a contour line layer corresponding to a quite large geographical area (lets say 510 km▓) that you only want to see at scales with more detail than 1:50000; therefore, when you do a "Fit in window" zoom on a 14 inch monitor, the display scale is more general than 1:100000, so will not see any contour line and you can concentrate your attention on other layers (roads, etc). If you make a general query now (all contours between 500 and 3000 m), the boundary rectangle of the selected objects will probably be the cartographic sheet itself, and then a zoom to selected will not display any object on the screen because displaying contours at this scale is also inhibited.
This is used to go the previous view (zoom or scroll). It supports up to 10 previous views.
Rasters: This option calculates the zoom level that is needed for displaying the entire map inside your client area (without needing scroll bars and trying to give the highest detail/resolution). If the image exceeds the client area, MiraMon applies a reduction zoom (/2, /3...), and in the opposite case, a magnification zoom is applied (x1, x2,...).
Vectors: This option is the same as asking for zoom=/10, because each time a new vector is loaded or closed, MiraMon recalculates the general area at zoom=/10.
Rasters and vectors at the same time: Because raster have priority over vectors, MiraMon acts as if there were only a raster.
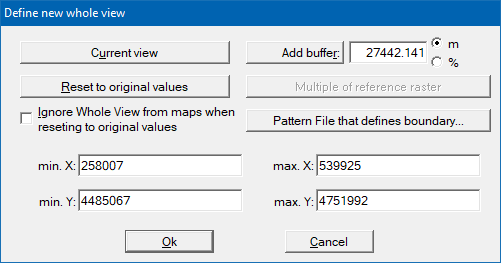
When you have a vector loaded, MiraMon allows you to define the coordinates that define the new whole view instead of using the entire area of the loaded vector. By pressing the button "Current view" the coordinates currently being visualized in the client window are taken, or they can also be defined manually. If you wish, by pressing the button "Reset to original values" you can return to the limits of the whole vectorial file. Once the coordinates of the new whole view are defined, if you press the button "General view " in the panel of buttons the new general view defined previously will be shown.
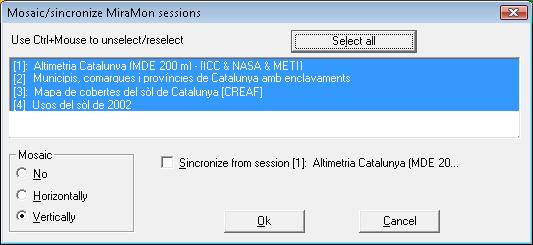
MiraMon allows you to work with more than one session at the same time. This is useful for comparing two files from the same zone, or the same file at different scales, etc. This option allows you to visualize all the sessions with the same zoom level and apply any zoom modification on all of them.
Show the windows of the selected sessions stacked (vertically) or parallel (horizontally) and synchronize them from the choosen session. Note that to properly synchronize sessions, the zoom management mode in all of them must be the same.
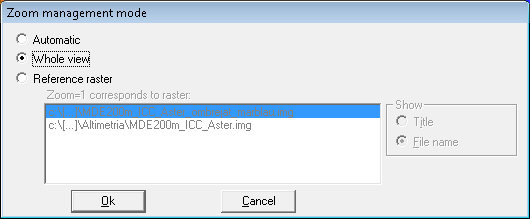
Support for multiple rasters has provided the opportunity to review zoom management. It is guaranteed the coexistence of the classic mode ruled by a raster, for the advantages of maximum visual quality and ease of location and metric control in remote sensing works, with the plasticity that many users who do not need this metric reference require. Two modes of zoom management are defined and a third mode, that automaticcally switches between the above.
Available modes:
Whole view mode
This is the most intuitive or natural zoom mode, so it is the default mode and recommended for generalist GIS users. In it, zooms are defined taking into account that the Whole zoom corresponds to the set of the scope of all layers or as specified in "Zoom | Define New Overview".
Overview zoom is assigned to /100 level in the zoom menu.
Notes:
Raster mode
In this mode a certain raster, which it is call "Reference Raster" has the Zoom=1. This is especially useful in Remote Sensing, where it is often needed very strict control of at what pixel we are working on and make sideways scrolls exactly pixel by pixel, as well as having an optimal display of raster quality at zoom=1.
Authomatic mode
This mode applies the reference raster mode if all opened rasters have the same pixel side, and apply mode Whole view otherwise or if there is no raster. Has the advantage of providing the highest visual quality several rasters of the same pixel side are being opened but the Raster mode own x15 zoom limitation if any raster is opened.
A floating box zoom bar is created for facilitate switching between zoom levels. The box can be on or off from the "View | Environment" and from the "Zoom" menu itself.
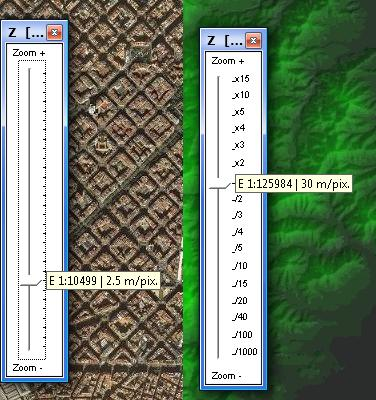
A new zoom scheme has been added to the Whole view mode that exceeds the 16 levels of the previous ones versions and provides 30, which allows the user to go from the view of the whole world down to strongly submetric details, many more than in most browsing environments cartography on the Internet and useful in bases at municipal scales and when vector editing is performed. Enlargement also allows avoid the annoying jump that occurred when increasing the zoom in and switch to a new zoom cycle. This change has entailed reprogrammed in 64-bit arithmetic of the zoom management. Zoom Management in Raster mode has the same 16 traditional levels and an additional level (/1000) for especially huge rasters.
In the case of Raster mode zoom management, zooms + and - are no longer made with respect to the center of the screen but with respect to the pixel in the upper left corner, if possible (that is, except when the raster dimensions with respect to the new zoom level allow it: no one is needed refocused). This allows, in Raster mode, to observe a certain pixel with total accuracy at different zoom levels, simply by placing it in the upper left corner of customer area. Selected zooms, on the other hand, continue placing the selection in the center of the screen.